

SERVICING – Shimano Ocea Conquest 201HG
This reel was launched hot on the heels of the successful 2014 Shimano Calcutta Conquest and it looked like other than a longer handle with an oversized EVA knob and a higher gear ratio, this reel must have been borrowing heavily from the 2014 Conquest’s parts bin… Or is it?
Well, for starters, this reel differs from the Calcutta Conquest in that it does not offer SVS infiniti braking, it has a narrower spool, it sports Carbon Cloth drag washers with 7-pieces of drag elements, a clicking line out mechanism called “Exciting Drag Sound” (Cringe cringe, trust the Nips to coin such a term!), larger Belleville Springs, so for a stronger drag, it also sports a backup mechanical anti reverse dog and a lot more grease than is normally found on such reels! So that’s good news for those who are loathe to crack open your reel to grease up.
The 2014 Calcutta Conquest had already proven itself to be a capable reel, befitting Shimano’s flagship status. With such an illustrious stablemate, I have nothing but good expectations for this little jigging reel.
First, a quick look at the reel externals.
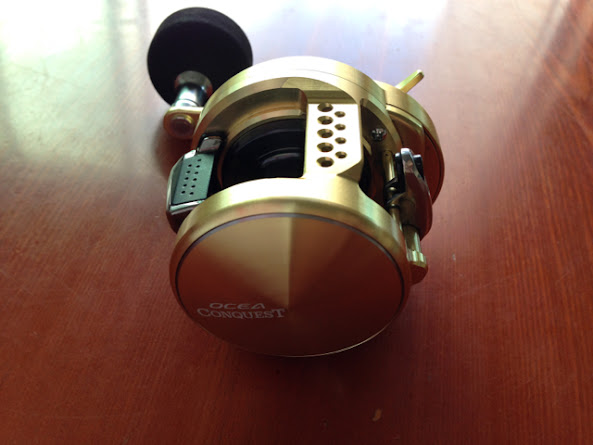
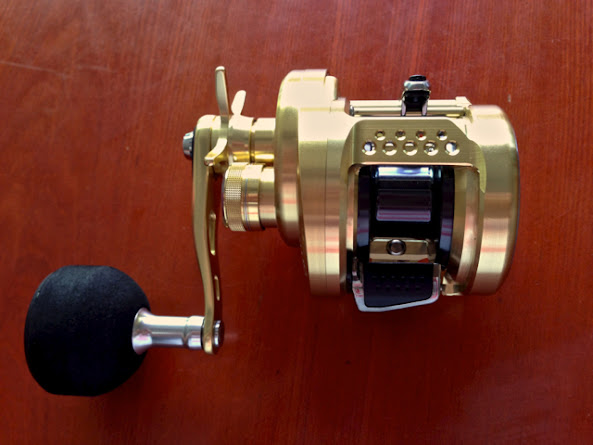
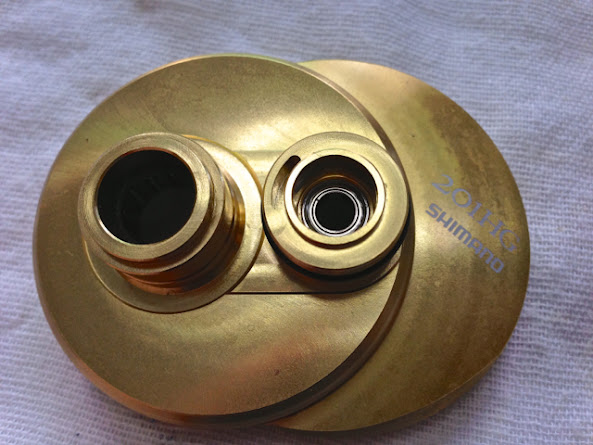
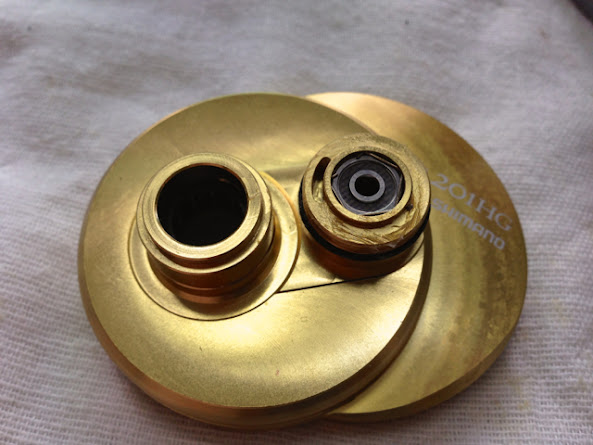
External views of this reel

This golden reel retains the same aura of luxury and solidly built feel that is synonymous with the Conquest name.

The spool is surprisingly narrow, with two large flanges. Shimano calls it Super Free Spool. The narrower spool width with correspondingly short travel level wind means that line will make a straighter exit even if level wind is on opposite ends with the line. This translates into longer casts, and more consistent drag tension.
Did I just say longer casts? Yes, this reel has the same Centrifugal Braking system as the Calcutta Conquest. Only, it doesn’t have the fine tuning provided by SVS infiniti dial of the Calcutta Conquest. The palming side plate had also lost the ported holes that one had come to relate with the Shimano Conquest name.
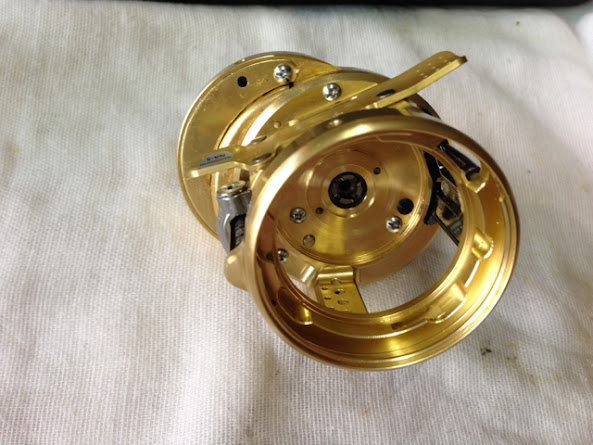
Four different views of this reel, and yet not a single screw is in sight!

Only when the reel is flipped upside-down do subtle hints of the screws show themselves. Although two draining holes are provided, they unfortunately are not in the correct place because the reel shaped such that it will almost be impossible to be placed in the way that the holes are in the lowest position for water to drain off.
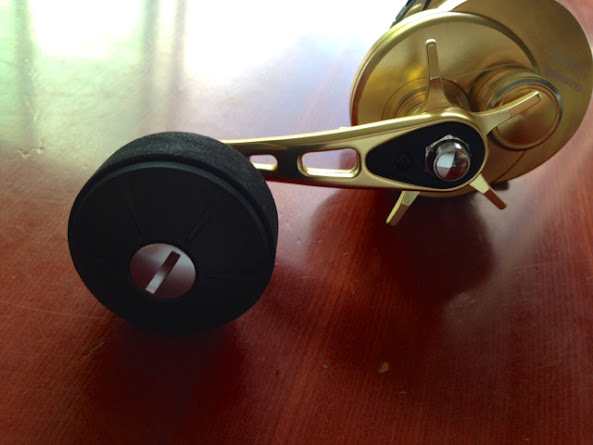
From whichever way you look at it, that 60mm long crank, with it’s man-sized EVA knob defiantly shouts it’s purpose. A retrieve speed of 78cm per crank for HG and 60cm for PG, a lot of torque is going to be transferred through this crank.

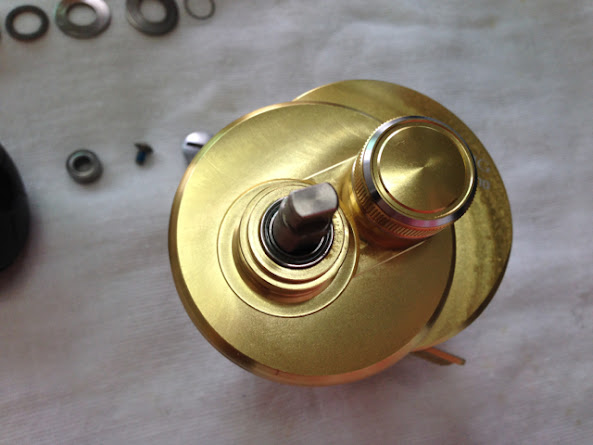
Surprise, surprise! There is a lot more grease used in this reel! Even the spindle bearings have grease on them.

Shimano had chosen this thin, glass-reinforced shield for their bearings. Their size is the same as that for most Shimano Baitcasters, 10mm x 3mm x 4mm (OD x ID x thickness)

Phenolic resin cages help to store lubricants for the balls.
The reel does not crank as smoothly as I had expected. Previous experience of the Antares HG and 2014 Calcutta Conquest had set a very high bar. So I was perplexed that the reel actually feel rough when I hold the body and swing the handle around. Looks like a complete stripping is needed.
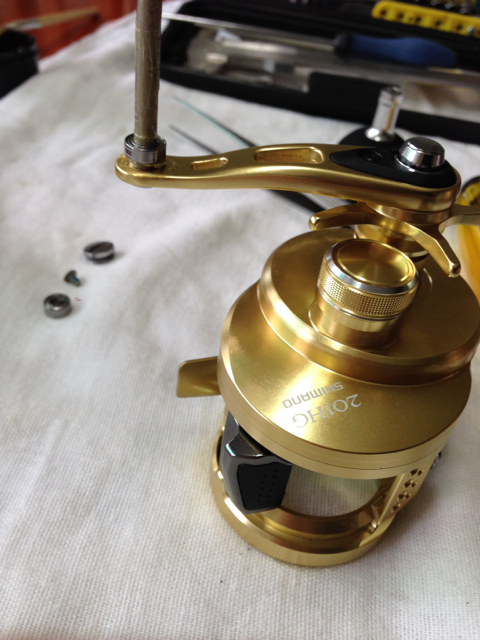
Always have the reel’s schematics with you when you strip down a reel

It seems an exercise in futility having a reel schematic with you for reference when your hands are slick with oil and grease, and you want to keep the doccument pristine. But often, it’s thanks to the schematic with me that I could figure how to strip or reassemble the reel. If you are afraid of soiling your original schematic or if it’s too tiny to see clearly, enlarge it to A3 size. Then use the enlargement.
Since the 201HG and 200HG are laterally inverted versions of the same reel, this step-by-step will apply to both the left as well as right hand winding models. But do note that the 201 Lefty model have counter-rotating screws (that means you turn clockwise to loosen) for parts #122 and #128, so don’t force if you find that some screw etc doesn’t want to come out!
In this step-by-step, I’ll be using my own terms to name the parts in English. But I’ll also include the Schematic #number with my part name, so you can refer to what I’m describing with certainty.
Some tools and kit I used in doing this reel
Before you start to strip the reel, ensure you have the necessary tools to do the job. I’m gonna sound like a broken record but I’m gonna say it again. It can be really frustrating to be halfway through stripping a reel only to find that you need a tool you don’t have, in order to complete the job. You then go out to buy the tool and come home to find the dog had scattered your reel parts to the four corners of the room and some part is lost… Now it’s hard to stay angry with the dog so instead of blaming yourself, be prepared. Get your tools and kit in order before you start.

This is my super duper µicro feeler-puller special tool. Without this, your reel cannot be stripped. You make this by straightening a 0-sized egg snap.

The other thing you need is a micro impact driver. I’ve never seen so much thread lock being used in a reel before I opened this one!

Look at the threads on Screw #128. It’s fully coated with thread lock! Hadn’t I been prepared with an impact driver, the screw will never have been able to remove!
Other tools you need to have are: size 1 Philips Head screwdriver, 11mm box wrench, long size 3 slot screwdriver, size 5 slot screwdriver, needle nose forceps, compressed air, degreasers and a hammer.
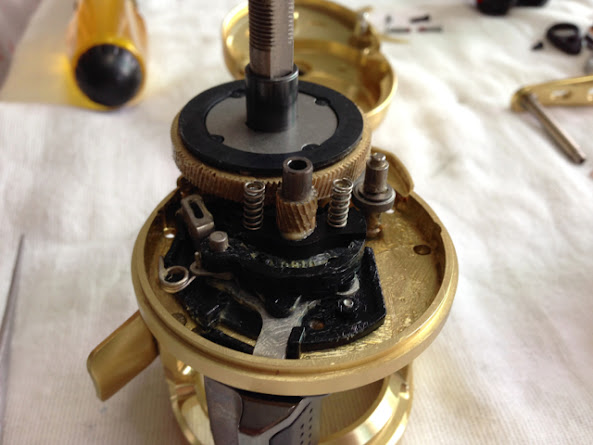
Now that your tool kit is in order, let’s crack it open to take a look at the insides.
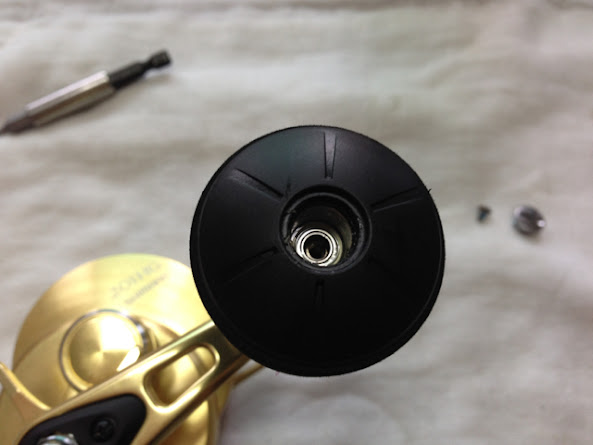
Handle Lock Cap Stuck

What a start! After removing Screw #1, this black Delrin Handle Lock Cap #2 is stuck in its home. Usually, a blast of compressed air will lift it out, but this one refused to budge. Digging this out with a sharp object will scratch the finish so it’s a no-no. Looking closely between the Handle Nut #121 and Handle Lock Cap #2, there is a small hole that can be seen in a gap between the two.
Straighten a small egg-clip, insert the hooked end into this hole and lift.

Inside the reel, very little grease is present. Shimano must be very confident it’s E.I. Treatment is sufficient protection against galvanic corrosion. But I always feel better if it is covered by a layer of grease.

See that deposit of grease on the right of the Sideplate #124? Other than that, the Sideplate #124 was bone dry.
The disassembled reel
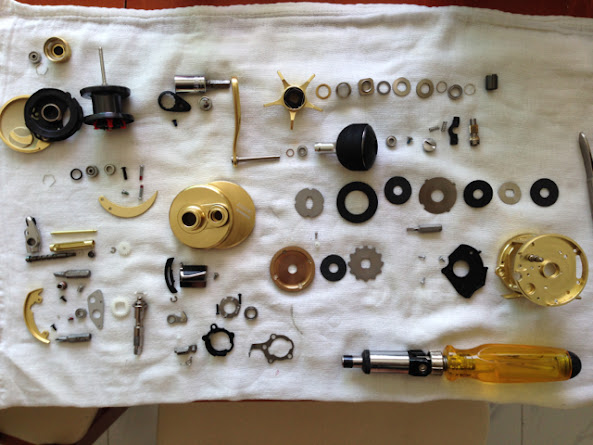
Here’s the reel disassembled into all it’s serviceable parts. Round baitcasters really are simpler to service than low profile ones.

Before I start on assembly, I’d like to say something here about marine grease. It is NOT the only lube I use. I do not use this to lubricate my drag stack. I also do not allow it to get into my anti-reverse bearings and my spool bearings. In fact, I use it only as a coating over metal parts to protect from galvanic corrosion after saltwater use, for lubrication, I use Cal’s Grease for my gears and drag. I use Quicksilver 2-4-C Marine grease not because it is any better than other marine greases, but because I have leftovers from servicing my Mercury outboards. If you don’t have access to a tube of Quicksilver 2-4-C Marine Grease, you can also use Cal’s grease to same effect.

Many have written to ask me where I got my CorrosionX. Well, I got it from an industrial supplier years ago. ReelX is the same product, only more expensive. But at the small quantities used for a fishing reel, it really amounts to nothing in return for the protection that these products offer.
Putting it back

I start by giving all metal surfaces on Frame #136, a coat of Quicksilver 2-4-C marine grease. I pay special attention to the areas that get waterlogged and out of reach after a rinse down, e.g. this slot for the Quick-Fire II Clutch Bar and the screw holes.

Snap the black plastic pad #137 back on.

Fit in the black plastic base #135.

Then attach the three self tapping screws #91 to hold the black plastic base #135 to the Frame #136.

Slip on Quick-Fire II Clutch bar #138 after greasing with Cal’s Grease.
Grease and insert Clutch Cam lever #134 into Quick-Fire II Clutch bar #138.
Secure with self tapping screw #78. CAUTION: Parts are moulded plastic, do not over tighten.

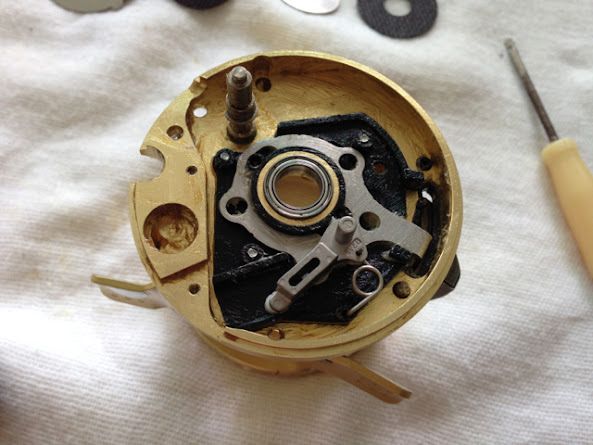
Big Pinion support bearing #79 have shields that can’t be replaced. I’m surprised that this bearing is not as smooth as I’m expecting this to be. QC slip-up? Can this be the culprit that is causing the rough cranking? I had the bearing cleaned thoroughly with degreaser in the ultrasonic. It came out smoother, so I lubricated it with ReelX and decided to use this till it gets bad. The dimensions are 12mm x 8mm x 3.5mm (OD x ID x thickness). Eventually when this corrodes, I will replace it with a greased bearing without shields, or a fully ceramic bearing which is corrosion proof.

There is a long end and a short end for Clutch Pawl Spring #133

Drop the long end of Clutch Pawl Spring #133 into hole in the black plastic base #135.
There’s a tiny plastic roller #75 that’s attached to the small stub of Clutch Pawl #132.
Grease and attach to Clutch Pawl Spring #133.

Before we start this part, go take a break, get a drink, empty your bladder, answer your whatsapp messages and make all the Facebook comments you need to make, then come back undistracted as this is the crux move (as rock climbers like to say) of the whole assembly.
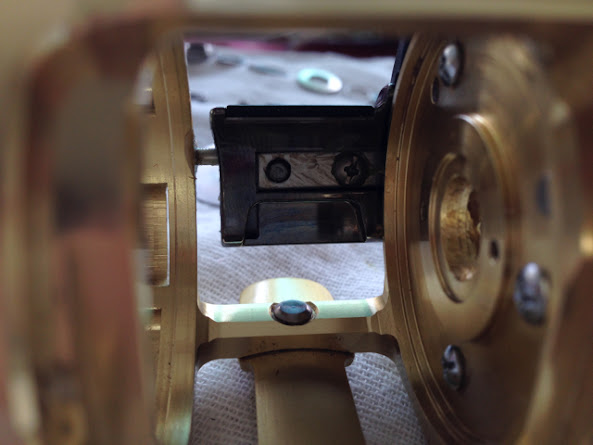
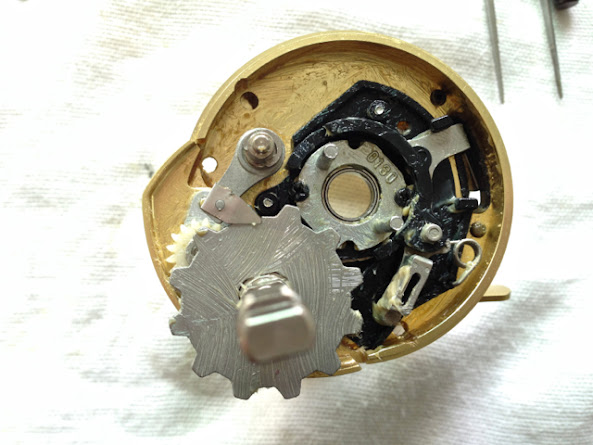
Prepare by greasing the following parts with a smear of Cal’s Grease: Clutch Cam #131; Clutch Pawl #132; Clutch Cam Retainer #72 and two retaining screws #71.
Seat the small bottom post (see three pictures up) on Clutch Pawl #132, into hole in Clutch Cam lever #134 (see four photos above). Drop black plastic Clutch Cam #131 over the post on Clutch Pawl #132. Do not attempt to fit Clutch Cam #131 into its seat at this stage.
Place metal Clutch Cam Retainer #72 over Clutch Cam #131. Note how the posts are oriented at an incline with the casted numbers “0180” on the right. Lightly thread in the two retaining screws #71, to holes in the Frame #136, until it is slightly holding everything together. Now twist Clutch Cam #131 to load Clutch Pawl Spring #133 while you press down on Clutch Cam Retainer #72. This will seat the cam into its seat. Continue to press down as you tighten the two screws #71.
Congratulations! The hardest part is over.

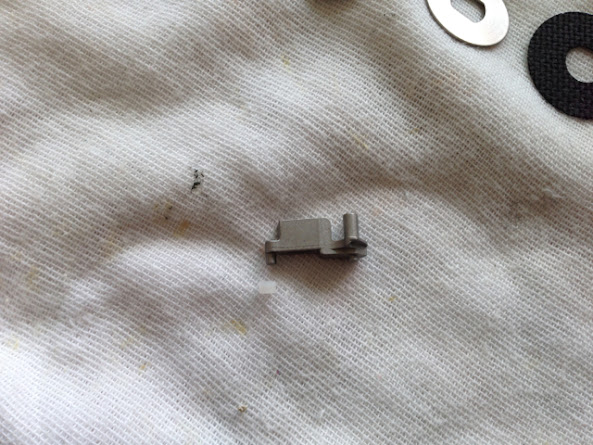
Grease and attach Mechanical Anti reverse dog #82 with its “beak” pointed towards Clutch Pawl #132 and secure with E Clip #81
Assemble the Levelwind

Oil Worm Gear Bearing #65 with ReelX and attach to Worm Gear #66. The bearing dimensions are 6mm x 3mm x 2.5mm (OD x ID x thickness). Drop in washer #64 and secure with E Clip #62.
Grease Worm Gear #66 and insert into Level Wind Guard #67. Slip on Line Guide #84. Seat Level Wind Guard assembly #67 to frame #136. Grease and install Level Wind Guide post #61.
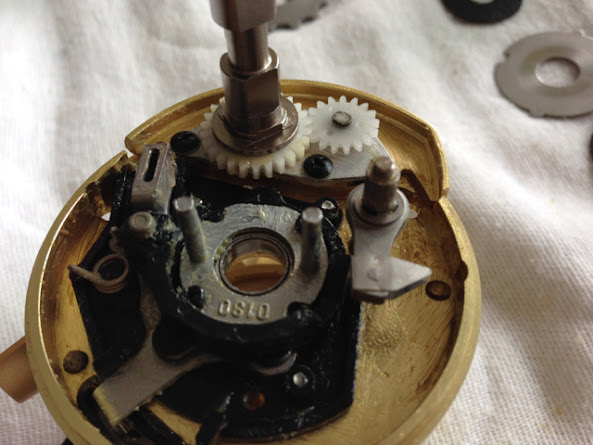
Drive Shaft Assembly

Drive Shaft #126 has a pair of spring loaded #53 plastic pins #54 on each end. Generously grease the spring to prevent them flying too far away if they should pop off during assembly and insert into hole on Drive Shaft #126.

Seat in white plastic Idler Gear #55 to catch on these plastic pins #54. Use a screwdriver to push the pins in as you snap on the white plastic Idler Gear #55.

Grease and drop in Retainer Plate #57, take note the side in contact with white plastic Idler Gear #55 has chamfered edges. Oil Small Drive Shaft Bearing #58 with ReelX and drop in. The dimensions are 9mm x 5mm x 3mm (OD x ID x thickness)
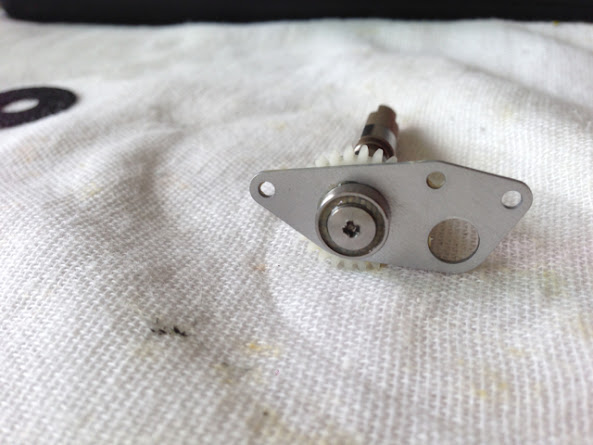
Secure with retaining screw #128 and place Drive Shaft Assembly aside. Note that if your reel is right hand wind, this screw tightens in a clockwise direction. For Left hand winding reels, this screw tightens in an anti-clockwise direction.

Grease and seat Gearbox Extension Plate #127.

Oil second Worm Gear Bearing #65 with ReelX and attach to Worm Gear #66. Cover with a protective layer of grease.

Drop in washer #64

Seat Drive Shaft #126 Assembly into its housing. Be patient as close tolerances make it slip in ONLY when all points are accurately juxtaposed.


Secure Drive Shaft Assembly #126 with two black retaining screws #56.
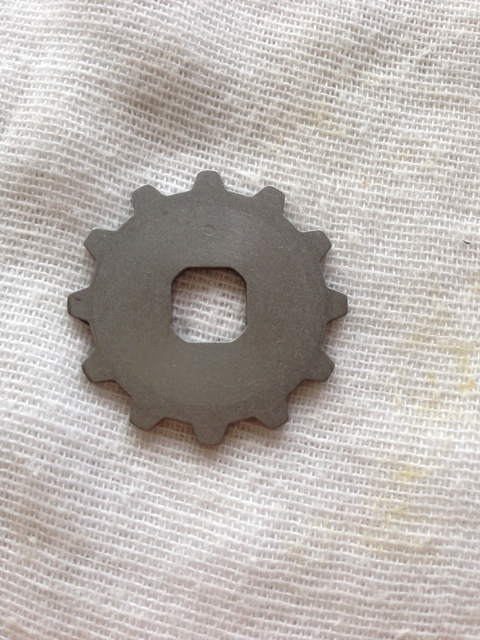
Drop in plastic Small Idler Gear #63 to Worm Gear #66. Note that the Small Idler Gear #63 fits only the end with a keyed slot

Secure Small Idler Gear #63 with E Clip #62.

Grease and drop Levelwind Pawl #85 into Pawl Cap #87 with the crescent blade facing out. Although Schematic shows a Washer #86, my reel does not have that part. Then drop Levelwind Pawl Cap assembly #87 into Line Guide #84. Push a toothpick into the hole in Pawl Cap #87 while simultaneously turning Drive Shaft #126 until the Levelwind Pawl #85 tracks with Worm Gear #66 and the Line Guide #84 starts to run in sync with the Drive Shaft’s #126 turning. Secure Pawl Cap #87, taking care not to over tighten.
Drive Assembly
Spool Return Ratchet #51 has one side with a dot on it’s face.
Grease lightly with Cal’s Grease and install in Drive Shaft #126 with the dot facing out. Sandwich Spool Return Ratchet #51 between the beaks of Mechanical Anti reverse dog #82

Install Thicker Carbon Cloth Drag Disc #50. Lightly grease disc with Cal’s Grease.
Carefully fill the gaps between teeth of Pinion #129 with Cal’s Grease, hang the neck on Black Plastic Yoke #130 and install

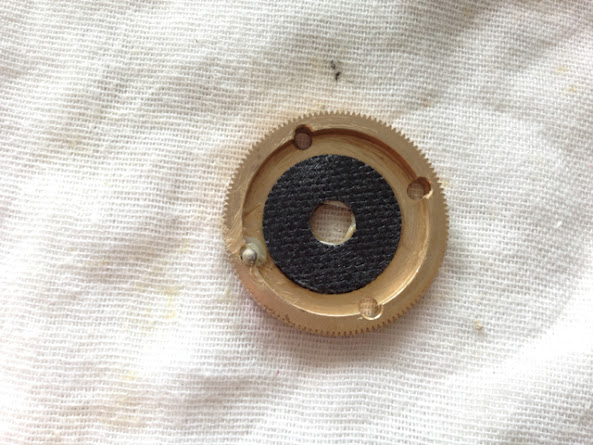
Main drive #125 of this 201 HG has thicker walls than the Calcutta Conquest 200. I suspect the pitch of the teeth are also bigger for this reel. Exciting Drag Sound is made possible by this spring and piston.

Paint on a thin layer of Cal’s Grease and seat white plastic base #48 into hole in Main Drive #125

Grease spring #47 and insert over Piston #46. Seat into white plastic base #48

Paint a thin layer of Cal’s Grease on Carbon Cloth Drag Disc #43, place into Main drive #125

Lightly grease Keyed Washer #45 with Cal’s Grease and place on top.
Paint a thin layer of Cal’s Grease on Carbon Cloth Drag Disc #43 and place on top

Paint a thin layer of Cal’s Grease on the bottom side of Eared Disc #44 and place on top

Carefully hold the sandwich of washers and fill the teeth of Main Drive #125 with Cal’s Grease. Install. Paint a thin layer of Cal’s Grease on Carbon Cloth Drag Disc #43 and place on top

Seat Drag Pressure Plate #41 into Black Plastic Clicker plate #42

Install
Oil Anti Reverse Clutch Tube #40 with ReelX and mate its castellated end with key slots in the Drag Pressure Plate #41

Drop in steel washer #23.
Finishing Up
Carefully coat Sideplate #124 with Quicksilver 2-4-C marine grease to prevent corrosion, but take care not to get any grease into the Antireverse Clutch Bearing #38.
Oil X-Ship Small Pinion Support Bearing #34 with ReelX and install. Bearing size is 9 x 5 x 3mm (OD x ID x thickness) Incidentally, this bearing was the one that was running rough. Despite many cycles in the ultrasonic cleaner, there was no improvement so I had it replaced with a spare from the Calcutta Conquest 200 that I have lying around the house.

There’s a Delrin plastic separator #33 to keep Spool Bearing #32 apart from X-Ship Small Pinion Support Bearing #34. Install with the notches facing the X-Ship Small Pinion Support Bearing #34.
Lubricate Spool Bearing #32 with your favourite light lube and install. Due to their tight tolerances bearings spin best on the lightest oil. Snap in Retainer Circlip #31.Grease threads and O-Ring #35, with Cal’s Grease
Drop two drops of ReelX into the Anti reverse Clutch Bearing #38 and fit Sideplate #124 over Frame #136. Apply Quicksilver 2-4-C marine grease to the threads of 3 screws #88, #90 and #88 to secure the Sideplate #124. Seat Gearbox Window #123 sharp end first into Sideplate #124. Secure with short screw #37.
Drop a drop of ReelX to oil the Cast Control clicking mechanism and install Cast Control Knob #25. Drop a few drops of ReelX oil and work it into the Big Drive Shaft Bearing #24 (12 x 8 x 3.5mm OD x ID x thickness) and install.

Lightly grease Washer #23 and install.

Grease and install Belleville Spring Washers #22 with their concave sides facing each other. These are full sized round spring washers that will surely exert greater pressure than the oval ones on the Calcutta Conquest.

Grease and install Double Sided Washer #21 with the copper side facing Belleville Springs #22.

Grease the threads of Drive Shaft #126 and screw in Star Drag Nut #122.
Before you put in the Star Drag Spring #19, temporarily fit on the Star Drag #17 to ensure the Star Drag Nut #122 and Drive Shaft #126 aligns with its key slot. Remove and place in Star Drag Spring #17.
Grease and install Golden Washer #18. (By this stage, I’m disappointed that the QC for this reel is not to par as I found the Golden Washer #18 is deformed). Also take this time to grease Handle #11 and Handle Nut #121.
Oil Insides of Star drag clicker mechanism #13, #14, #15, #16 with ReelX and install Star Drag #17, taking care the keyed slot aligns with Drive Shaft #126 and Star Drag Nut #122. Maintain pressure to keep from springing apart.

Place in Handle #11 that you had pre-greased.
Secure with Handle Nut #121. Note there is a dot punched into the Handle #11. It is used to align the point or the flat side of Handle Nut #121 so that the Handle Lock Cap #2 can fit in nicely. Remember that for Lefty reels, Handle Nut #121 turns counter clockwise to tighten.

Install Black plastic Handle Lock Cap #2. If it is difficult to fit in, remove and align Handle Nut #121 such that one point of the nut is pointed at the dot. Do not Force Handle Lock Cap #2 into its home as it will become impossible to pry out without damage.
Secure Handle Lock Cap #2 with Screw #1 whose threads you lubricated with Quicksilver 2-4-C marine grease.

Grease Handle shaft #11 with Cal’s Grease and insert copper Washer #10
Oil Ball Bearing #9 with ReelX and install. This ball bearing tends to get corroded first, so coat it thickly with Cal’s Grease as a preventative. The size of this bearing is 9mm x 4.9mm x 3mm (OD x ID x thickness). I find the size strange, and after rechecking several times, I’m sure that I didn’t make any mistake in my measurement
Oil the Thick Ball Bearing #7 with ReelX and insert into Knob #12. This is another irregular sized piece. After checking several times, and allowing for temperature to stabilise, it is still 9mm x 4.9mm x 4mm (OD x ID x thickness). Install Knob #12 to Handle #11

Secure with Screw #6, taking care not to over torque as it will wear out the bearings prematurely. A drop of Loctite Thread lock may be desired in keeping the screw secure

Screw in cap #4

Oil Ball Bearing #32 with a light lube and secure with C Clip #31 to Hatch #139. With a drop of light oil on a Q-tip, apply it evenly on the golden raceway that the Centrifugal Pellets #95 press against. Install Spool #94 and Palming Sideplate #143 and your reel is assembled.
Finally, wet a rag with some Simple Green and wipe away excess grease from the outsides of the reel.
Your reel is serviced! Enjoy!.
HTH,
LL
I hope this step-by-step guide helped you in servicing your own reel too. If you found this useful, please click the blue LIKE and FOLLOW buttons. If you would like me to help you service your reel, or if you would like to help me with the cost of keeping this blog running, please drop me a message via WhatsApp at +65-9431-0400. Thank You!
©Lawrence Lee
All Rights Reserved
If you want to use any content for your own publication/web/blog, please write me @ LawrenceLee_TC@yahoo.com

Great article with practical details. Unfortunately, I have a cross thread in my handle nut #121. Any idea if this is standard M7 Shimano uses on their reels like Curado?
I don’t know if it’s the same. But the shaft on the Conquest is a softer lightweight metal than that of the Ocea Conquest. Many swap shaft using the Ocea Conquest shaft after they found their threads worn at the star drag contact area or from cross threading the handle nut. Hope that helps.
Thanks. The Ocea Conquest shaft info is very useful. Also, it is confirmed that Shimano Ocea conquest 200 / 201 uses the same reel nut #121 as Shimano Curado : which is M7. Fortunately, there are lot of faster suppliers for the M7 nut than ordering form Shimano. For me, Shimano took 3 months.
Hello. Great article! Could you tell me is it posible to swap spool betwen Ocea and Callcuta? Do they have similar weight?
The Ocea spool has a thicker flange. If you use it on the Calcutta Conquest, the levelwind worm gear need to be replaced too. And vice versa on the Ocea Conquest. The CQ spool is wider. So the levelwind wouldn’t match and you will have line laid unevenly in the middle.
Hey Lawrence awesome write up once again. One question. Where can i find the complete line guide set for sale online? Im in the us and i know these parts are hard to find but i like the wide inside opening that the ocea line guide has on the inside. I need #84 #85 #86 #87
Try this place:
http://www.plat.co.jp/shop/catalog/optionparts/language/en/manufacturers/5/siries/76/
If you can’t find what you want, shoot them an email, even in English. They will respond.
Is there any posibilities to swap the gear set in the conquest 201 with the the gear set from ocea conquest? I’m quite interested with the clicker features in the ocea conquest gear. Is the gear gonna fit in there since the both reel body looks quite similar. Thank you
Yes you can. However, you also need to replace the whole drive set — pinion, main, all carbon fibre washers, stainless steel washers, spring, clicker dog and plastic clicker plate.
Depending on your reel, you may need to modify the clicker plate slightly if it’s too thick in your housing.
You mentioned above that you will change to full ceramic bearing for your pinion gear bearing. Im planning to do the same for my ocea conquest and also my ocea jigger. I noticed when servicing, the pinion gear bearing gets corroded easily.
Where do you source for the full ceramic pinion gear bearing ? ( 12x8x3.5) ? Ive tried hedgehog and boca but they dont carry that dimension.(in full ceramic )
thank you
You can look up http://www.lily-bearing.com/.
Ask for the MR 128 unshielded Silicon Nitride full ceramic bearing.
Other than price concerns, I’m sure you’ll be very happy with the bearing.